Showing posts with label Handmade Weddings. Show all posts

Tuesday, October 23, 2012

Brooklyn Bows featured in Manhattan Brides Magazine

page 38.
Make.Shop.Live. is proud to be in this month's Manhattan Brides Magazine.  We have already featured our custom magnetic fabric bow ties for our friend's Brooklyn wedding. Click the below photo to learn how we did it!


Congrats to Alessandra and Paul Womack and it was a pleasure to provide these special re-purposed gifts for your guests to wear throughout the reception.  For more tips on re-purposing materials and custom event crafts, check back every Tuesday for the How-To's Day Tutorial.

Make.Shop.Live.

Tuesday, August 21, 2012

How-To's Day: Summer Upcycling Refresher

Kevin here,

Make. Shop. Live. has had a hot summer and busy time for crafters and creative types.  We wanted to list some of the hottest How-To's from these past few months to get your creative juices flowing!

Using a variety of extra fabrics and clothes and some strong little magnets, our team completed an assortment of handmade cloth bow ties.  Upcycle those old outfits and learn how now!  


Follow these 4 quick steps to make your own Bookends out of Vinyl LP Records.


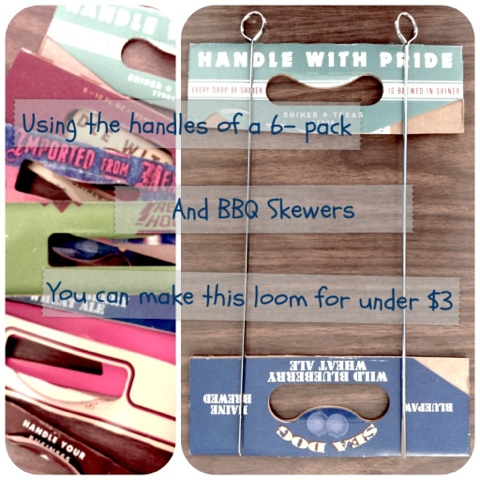
Beer and BBQ should have been on your agenda this summer!  Use the leftover packaging and Skewers to settle in for the winter and start your Loom.


Using fresh Lavender flowers and your favorite vodka, mix it up and enjoy a handmade refreshment.


The Upcycling continues every Tuesday.  See you here next week for the How-To's Day Handmade Idea!

--Kevin


Tuesday, June 12, 2012

How-To's Day: Alessandra & Paul's Bow Tie Wedding Decor


The bride and KC both love bows, so it was pretty clear from the beginning that some handmade bow ties were on the horizon.  Using a variety of extra fabrics and clothes and some strong little magnets, Make Shop Live team completed an assortment of 140 handmade cloth bow ties.


KC did a great many tasks at our friend's wedding in Brooklyn.  One of the most fun projects was the seating cards for each guest at the reception. The bows are a variation on a Make Shop Live holiday project post here. For Alessandra's wedding we dropped the scale down to make the bow roughly 5" wide by 3" tall. The bow is held in place with a magnet for the fastening just like this magnetic brooch project we featured in May here.


To wear the bow ties as a brooch all you need to do is slip a magnet on the other side of your clothing to hold it in place. Best part of the magnet brooches is you don't ruin your fancy clothes like sometimes you do with a pin back that snags.

We started with some old clothes shown below and dug through our reserved stash of navy and pink fabrics for the assortment of bows.  To make some of the pinks look more vintage and antiqued, KC tea stained the fabrics first before constructing the bows.  For a look at how to tea stain fabric of your own here is how to tea stain fabric. 


Utilizing the project instructions here for the bow, the main variation for these magnetic brooches is placing the magnet inside the backing of bow as you assemble it as shown below:

Using a magnetic board from Ikea we were able to display all the bows and seating cards quickly and easily since they all had super strong magnets inside them.


Here are some color sample tests KC sent Alessandra to show what colors were available to Make Shop Live in Navy and Pink.


Enjoy! and have fun!!!
If you try this project out we'd love to see some pictures :)

XOXO, KC

Wednesday, June 6, 2012

Wedding Wednesday: Stitched Wedding Programs

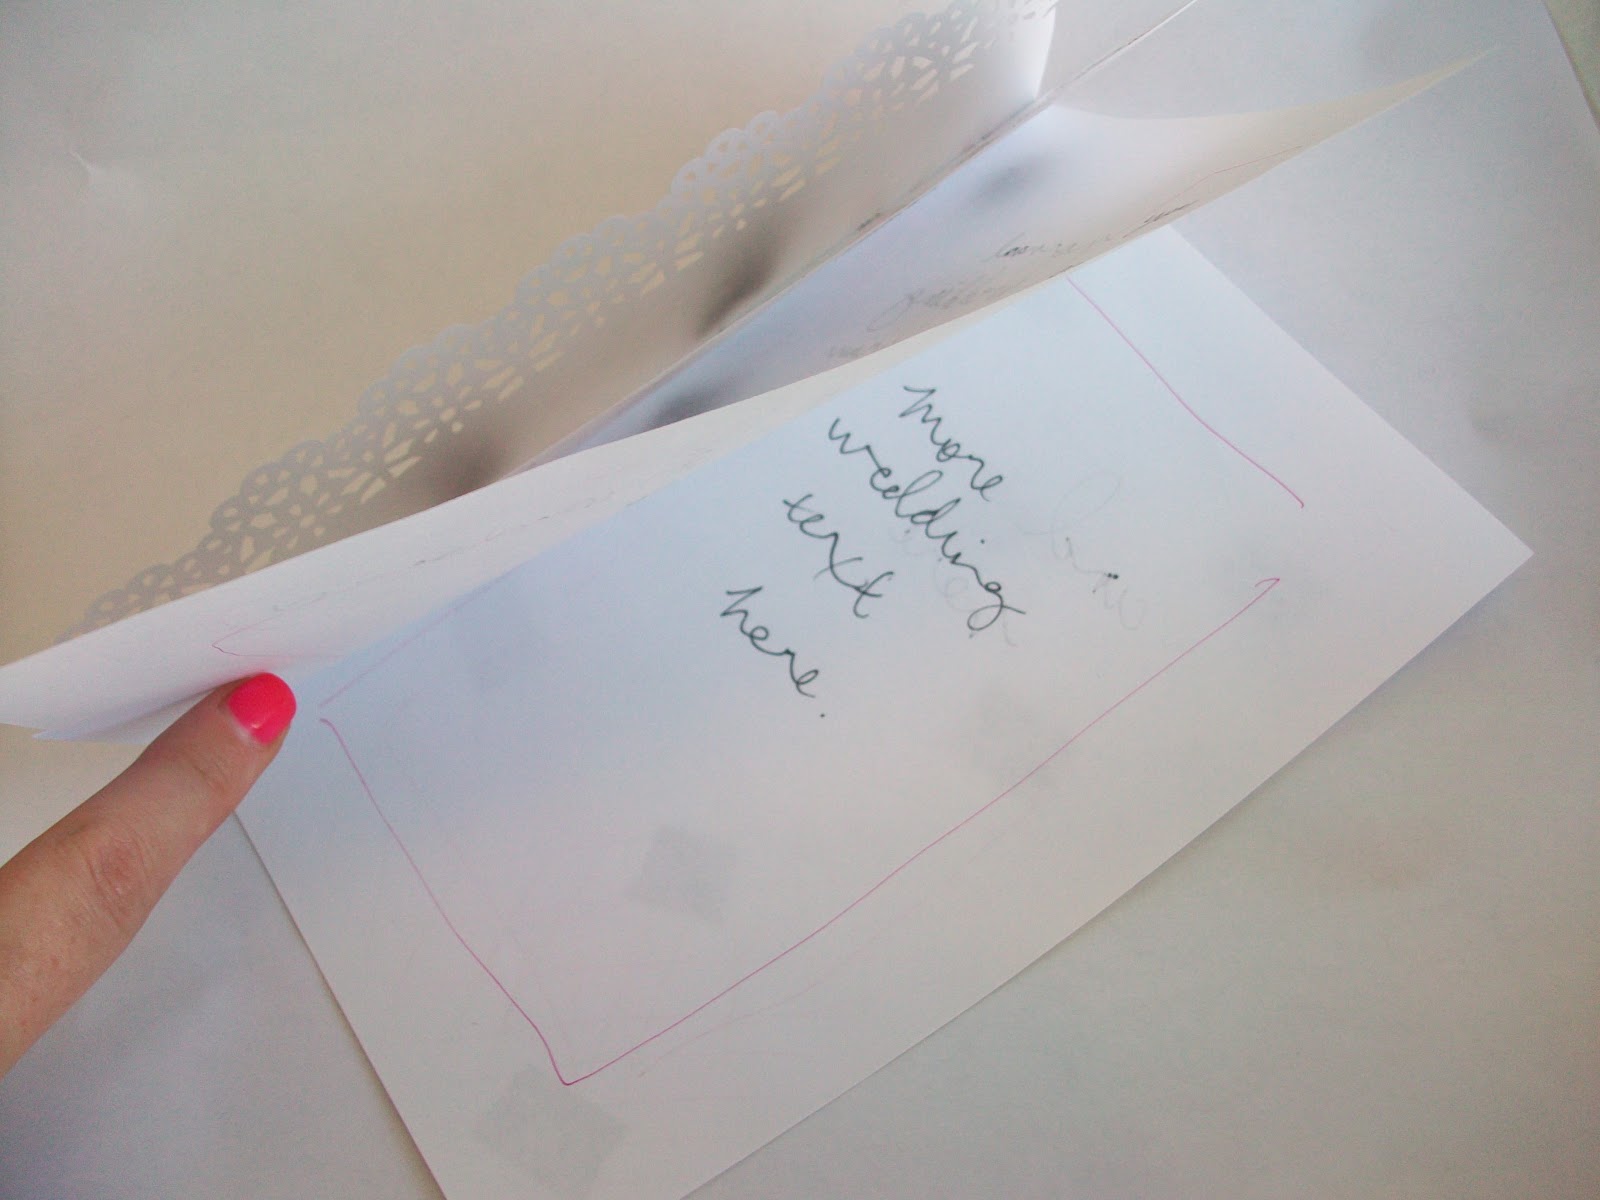
While in Brooklyn, Alessandra, her two sisters and I gathered together to assemble the programs for her wedding.  Loosely based on a pin I found on Pinterest shown here, we created the programs with color photocopied covers that were punched with a Doily Punch and layered over a single fold sheet of wedding details.

Here is the Martha Stewart Doily hole-punch pictured below:

Alessandra made 12 different patterned cover variations featuring patterns from one of her favorite artist William Morris. Using a William Morris calendar she has treasured she used the paper the interior details are printed on to the copy center since it was both recycled and off white so the inside of the cover would match.


Before the trip I made several "tester" programs so Alessandra and Paul could get a feel of what they could do with the programs. I think it makes it way easier to plan out what you want just by testing out your options. The original test had a 3 part cover as shown below.


I am quite glad that we just did the one printed cover with the punched edge at the edge of the paper. While it still wasn't "quick" punching each edge, we were able to sit in assembly line and punch the edge of the cover, layer the cover over the printed info / middle section, machine stitch everything together, then tye the strings and trimming them up.
Using the presser foot as a guide, I straight stitched down the covers of each program. All 140 of them!

Once finished you have a 4 page program perfectly customized and special for your wedding day :)

On a scale of 1-10 on how easy and accessible this project is I would rate it a 3. It is quite easy in that you really just need to know how to sew in a straight line, use a decorative paper punch, and have some patience if you are making +100. Handmade art is time consuming but honorable!

Thanks for checking out our hard work! Hope you enjoy them for yourself on your big day if you try it out. Let us know if you do - we'd love to see pictures!!
XOXO, KC


Tuesday, June 5, 2012

How-To's Day: Mercury Glass Wedding Votives

Alessandra really liked the look of Mercury Glass which can be quite pricey.  Wanting votive glasses and candles filling the two-stories of the historic Montauk Club would be a challenge if not for this easy DIY project.

For this project you need Looking Glass Mirror-Like Paint and a spray solution of equal parts vinegar and water in a spray bottle.

Solution = 1 part Vinegar to 1 part Water

After pooling loose votives from various sources we came up ~300 short from our target so Alessandra ordered some votive holders to complete the project.  This project is WONDERFUL for upcycling (Making  use of recycled items as materials while saving energy and resources that would be used in recycling) and is a great way to refresh new life into old jars and other glass items.

Spray the votives or item you are working on with a light layer of the silver paint.

Here Alessandra is showing off her technique rolling the paint around in the glass to make sure there wasn't a big glob. Set aside to dry.  After around 3 minutes you can spray a light amount of the vinegar and water solution inside the painted area and lightly dab the paint with a paper towel creating the variation in the paint making it look "cracked".

As the layers of paint build up you can control the opacity more, just make sure the beginning layers you have a light touch with the vinegar solution because it strips the paint creating the technique.  It is super helpful that this paint reacts to vinegar because clean-up is a breeze with non-diluted vinegar unlike regular spray paint.

Layer #1 down! As you can see it is very light and you will need several layers to create a wonderful effect.

Ale` finishing up a votive
We worked on this project in sections which is helpful to not get burned out mid-project. It also helped the enjoyment level by being in beautiful Prospect Park where we could sit out and work in the grass.

Now for some examples from the big day :)


Along side the mercury glass votives and flower centerpieces, we used vintage number cards from Etsy seller 30one for the table numbers shown above.

Here the candles around the cake shows off the hint of pink this Brooklyn Bride highlighted in her Navy & Pink celebration. The bow theme (which will be highlighted in a soon-to-come post) is continued on the two -tiers of their cake which was two of my favorites: red velvet and carrot cake. As a wedding gift and added touch they received the Kate Spade New York "Grace Avenue" Dessert Serving Set which was the perfect addition to the fabulous cake table.

We had a wonderful time working on these votives and we hope you enjoy making some for yourself too.
Happy Making!
XOXO, KC


Tuesday, September 27, 2011

Our 3rd Wedding Anniversary

The Tuesday Tutorial Post is going to be replaced today with some highlights from our wedding. Tomorrow and possibly even all this week I am going to put together posts with pictures from our wedding and some tips I found along the way :)  Hope you enjoy!

Three years ago today, Kevin and I got married in my hometown, Raleigh, North Carolina.

This cake is the inspiration for the wedding and was the main part of our invitations I created for our wedding.  I made several versions before I came up with this appliqued and machine embroidered cake .  This color pallet originally started out of necessity because our reception site was floor to ceiling RED, bright red, and I really wanted a colorful wedding.  We chose red and turquoise as our wedding colors, however I made these cakes long before I picked the bridesmaid dresses or I would have brightened up the blues. Anyway,  I will talk more about this process in my handmade wedding post later this week.

When Kevin proposed just before Christmas '07 I was living in Brooklyn still.  I moved to LA in Feb. 2008 after we got engaged, and we got married in September '08.  Needless to say I was on a tight schedule, between moving and everyone living all over (Kevin's family is from outside of Dallas, TX) some wedding plans and decisions were made out of pure necessity.  It wasn't until our big day was done and I was home from the honeymoon that it even clicked what things to even do for a wedding.  I had two girlfriends get married before me, but for the most part within our circle of friends we were one of the first weddings. I didn't really have any insights and was all over the place in my vision, but once I took a step back and soaked everything up it made me kinda wedding crazy! There are just endless combination of all kinds of themes/ decorations that if I could get remarried to Kevin a million times over I would.  For now, I am into bringing my insights and tips to my friends, and you too.  Everyone deserves to make their big days as wonderful as they could ever dream it to be.

It has been so nice preparing for this post today.  I have been transferring the bulk of my wedding pictures off my external hard drive onto my new desktop, and I had no idea about some of the pictures I found! I was totally pleased at some shots that either I overlooked before or my style has just changed enough for me to see pictures different.  Whatever it is, I have been engulfed in all these pictures today.  Maybe it is that we only printed off a limited amount in the album we have so I feel like I have seen the same ones over and over too... Anyway, it is so nice going back over them and seeing all of our friends and family with us. Gosh, I love everyone so much it is just an emotional pat on the back to think of everyone coming out to celebrate us!!!! How did we get so lucky :)

Kevin, thanks for joining me on this crazy journey. I love you so much and I am so lucky to have you as a best friend and partner in everything- you are my rock.

Thanks for everyone for coming to our big day and celebrating our love with us!!! Every year  it is so nice being able to reflect on how special everyone is to me. I care deeply for each and everyone of the relationships I have been blessed to be a part of.  XOXO, KC

Tuesday, September 6, 2011

How-To's Day: MAKE a Paper Heart Garland

Hi Guys! Today we are picking up our Tuesday Tutorial Section with a quick way to bring the LOVE into any party or decor. <3

Over the summer my wedding mania (For Alessandra- and others of course, Kevin and I are coming up on our three year anniversary this month!)  has been brewing continuously and I am just overfilled with wanting to celebrate and have a party with lovey-dovey decorations. Bonus: these paper garlands can be made quickly in a group... for a shower or wedding with minimal supplies and craftiness. :)


The best part of this project is how quick and easy it is! As a paper crafter I am left with a ton of strips of paper in various lengths and this is a great project to maximize scraps.  If you don't have scraps of paper already at your disposal, with a deckle edge ruler you can rip perfectly torn strips in lightning speed. There are tons of variations of "teeth" to the various deckle edge rulers so you can find a tear that you like- my favorite is a slight tear that feels more vintage, soft tear that is smoother than straggly.  

Related Posts Plugin for WordPress, Blogger...